Step 1: From the main mxCourt Document Page, click on Create Document.
How To Create A Document
How To efile Land Records
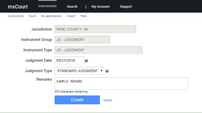
Step 2: You will be prompted to select an Instrument Type (e.g. Judgment, Land Record etc.).
Select Instrument Type Screenshot
 (Click to enlarge)
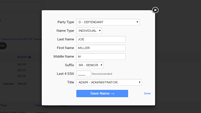
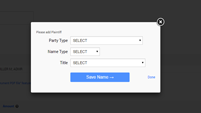
Step 3: Based on the selected Instrument Type, follow the text fields on the detail page. Please follow the screen instructions and read the HELP next to each field "?" as you complete the text fields.
Follow Prompts Screenshots
 (Click to enlarge)
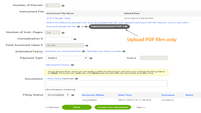
Step 3.1: Attention: Only Windows users with the Chrome or Firefox browser can scan and upload a .pdf file from this page. Users on all other platforms and browsers including IE cannot use the Scan and upload PDF file feature on mxCourt. Either install Chrome or Firefox or scan the document first or outside of this page and use the "Upload Instrument PDF file" button to upload the .pdf file.
3.1.1 Connect your scanner: Make sure your scanner is connected to your Windows PC.
3.1.2. One-time - Download/Install Twain Driver: Before you scan for the first time, please download this Twain driver file for Windows7 and up, and install it on your Windows operating system (you only need to do this one time): Download mxCourt Scan Twain Scanner Driver for Window7 and up - Once the file is downloaded, click on it and follow the on-screen installation instructions.
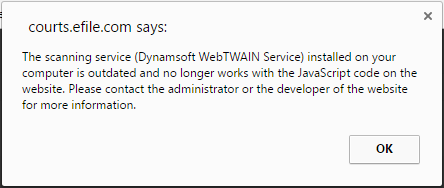
3.1.2.1. Outdated Twain Driver: If you see this message when trying to scan a document, click OK on the alert box that appears and then click the 'Download' button to download the newest version of the Twain Driver. Now, uninstall the previous version of this driver from the Windows "Uninstall or change a program" screen. Once you have uninstalled the older version, you can now safely install the new Twain Driver you just downloaded. When you attempt your first scan after the update, the website will ask for permission to use the scanning tool. You will need to "Always Allow" access and click 'OK'. You should now be able to scan your documents.
Twain Driver Update Screenshot
 (Click to enlarge)
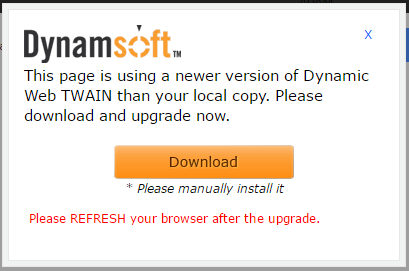 (Click to enlarge)
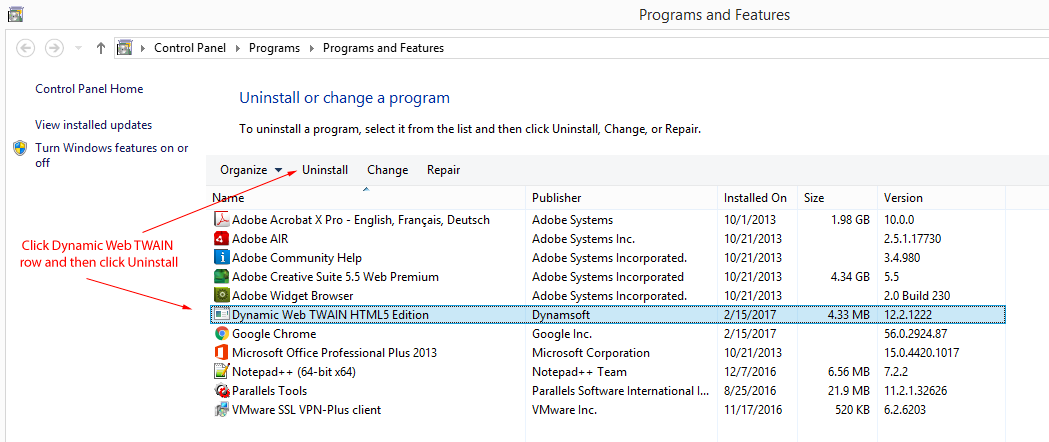 (Click to enlarge)
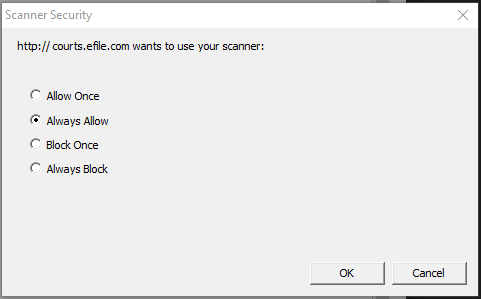 (Click to enlarge)
3.1.3. Click on the link "Scan and upload PDF file" in mxCourt: You will be prompted to select a scanner from the drop down menu. Insert the paper into your scanner and click "Scan" on the window on your screen. When you are done scanning, click "Upload file" in the lower left corner.
How To Scan Your Documents
Upload Documents Screenshots
 (Click to enlarge)
Options: Rescan, amend or replace a document after you scanned and uploaded a file:
1. Delete the uploaded file first via the Delete link.
2. Click on the "Scan and upload PDF file" link. You will still see the initially scanned pages. If you need to amend a page, simply scan it and it will be the last page of the document. At any time you can click on "Upload file" and upload the new document. If you do not want to re-use the initially scanned pages, refresh your page and the scan window will clear and all scanned pages will be deleted from the scan window.
Important: Users on all non Windows platforms and non Chrome or Firefox browsers cannot use the "Scan and upload PDF file" feature. They can only scan their document first or outside of this mxCourt page and use the "Upload Instrument PDF file" button to upload the .pdf file.
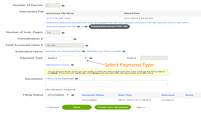
Step 3.2: Select a payment method from the drop-down menu. As account administrator, you can edit, add payment method(s) under the "Account" link and Payment section.
Select Payment Method Screenshot
 (Click to enlarge)
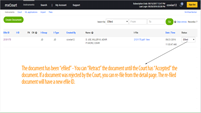
Step 4: At the bottom of the page, you will see the status drop down options. If you do not efile your document, it will be in the INCOMPLETE default status. You can resume the efiling of this document at any time. You can also change the status to DELETED. However, if you are ready to submit and efile the document to the court, please change the document status to EFILED. This will place the document into a chronological queue at the court.
Step 5: During the EFILED status, you can retract the document from the court and either place it in INCOMPLETE or RETRACTED status. The court will not be able to view documents in INCOMPLETE, RETRACTED or DELETED status. Once the court has changed the status to RECORDED, you will receive a notification via a mxCourt email that the document was recorded successfully. The court might also change the status to REJECTED. You will receive an email notification when this happens. Sign in to your mxCourt account, select REJECTED on the upper right, and open the document. The court will leave instructions under DocuNotes with instructions on what to correct. Once the corrections have been made, you can RE-EFILE the document at no extra charge via the button at the bottom of the page.
Document Efiled Screenshot
 (Click to enlarge)
Step 6: Once the court has reviewed your document, it will go into ACCEPTED status. At that point, you can no longer retract your EFILED document. Upon successful payment processing of the fees by the court, the court can set the status to RECORDED.
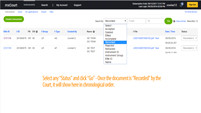
Step 7: If your account enables you to search on mxCourt, you can search by a variety of options on the search page. If your account enables you to only efile on mxCourt, you can view all efiled documents by your organization on the mxCourt List page; you will not be able to search on the search page. If your account enables you to efile and search, you can do both actions previously mentioned.
How To Search For Your Document
Document Status Screenshot
 (Click to enlarge)
2. What Are the Different Status Types on mxCourt
- ACCEPTED = The court will select this status after you have “EFILED”
- DELETED = You can delete a document while in “INCOMPLETE”
- EFILED = When you are ready to submit to the court, select “EFILED”
- INCOMPLETE = When you have started a document (before EFILED), it is “INCOMPLETE”
- RECORDED-U = When the court has recorded the document, it goes to “RECORDED-Unverified”
- RECORDED-V = When the court has recorded and verified the RECORDED-U document, it goes to “RECORDED-Verified”
- REJECTED = After you efiled, the court can change to “REJECTED” RETRACTED = You can retract a document while it is in “EFILED status
The efile flow and status stages of a document from creation to recording:
- 1. Create a new document = INCOMPLETED
- 2. Submit to the court or efile select = EFILED
- 3. The court can either change to ACCEPTED or REJECTED (You can re-efile a rejected document - use the re-efile button on the detail page)
- 4. After the document is ACCEPTED by the court and successful payment processing is completed, it is RECORDED
- 5. After the document is RECORDED, the court places the document into FINALIZED